
How to Create a Gallery Wall: The Complete Step-by-Step Guide
A gallery wall is the most personal, versatile, and impactful way to fill a large wall. It tells your story through art, photos, and objects — and when done right, it transforms a room from “nice” to “stunning.”
But gallery walls can also go terribly wrong. Crooked frames, clashing sizes, random placement — we’ve all seen the Pinterest fails.
This guide walks you through every step, from planning to hanging, so your gallery wall looks intentional and polished.
Step 1: Choose Your Wall
The best walls for gallery displays:
Avoid walls with:
Step 2: Decide on a Style
The Grid
Evenly spaced, same-sized frames. Clean, modern, symmetrical.
Best for: Photography collections, modern interiors, type-A personalities.
Frame count: 4, 6, 9, or 12 (even numbers)
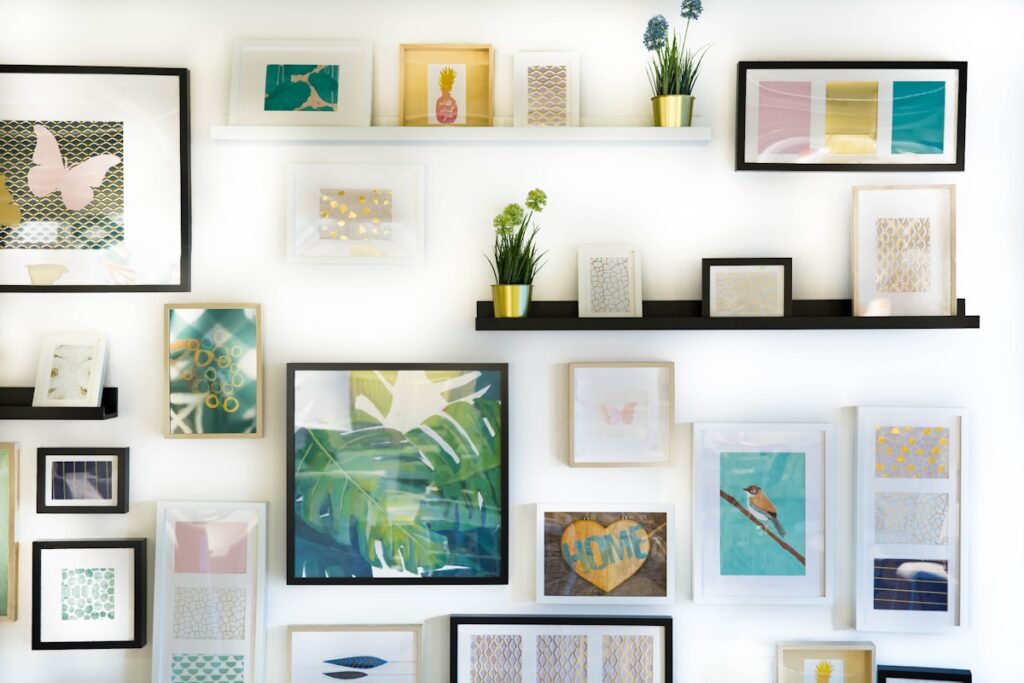
The Salon Style
Mixed sizes, varied frames, organic arrangement. Classic Parisian salon look.
Best for: Eclectic collections, vintage art, maximalist interiors.
Frame count: 7-15 pieces
The Linear Line
All frames aligned on one horizontal or vertical axis. Clean but more flexible than a grid.
Best for: Narrow walls, hallways, above doorways.
Frame count: 3-7 pieces
The Asymmetric Cluster
Organic arrangement with a clear center of gravity. Relaxed but intentional.
Best for: Most spaces, beginner-friendly.
Frame count: 5-10 pieces
Step 3: Select Your Art
Cohesion comes from one of these unifying elements:
Mix for interest:
Our recommendation: Start with 1-2 pieces you absolutely love, then build around them.
Step 4: Frame Selection
Rules:
Frame colors by style:
Step 5: Plan the Layout
This is where most people fail. Don’t start hammering nails — plan first.
Method 1: Paper Templates
Method 2: Floor Layout
Method 3: Digital Planning
We recommend Method 1 — it’s the most reliable and gives you the best feel for the final result.
Step 6: The Hanging Process
Spacing Rules
Hanging Tips
Step 7: Fine-Tuning
Once everything is hung:
Common Gallery Wall Mistakes
Mistake 1: Too Much Space Between Frames
If the gaps are bigger than 4″, the pieces stop reading as a group. Keep it tight.
Mistake 2: No Anchor Piece
Every gallery wall needs a largest/heaviest piece that everything else orbits around.
Mistake 3: Matching Everything Perfectly
Some variation in art styles creates interest. Just keep the frames consistent.
Mistake 4: Ignoring the Room’s Architecture
A gallery wall should respect the room’s lines — align with the sofa, the ceiling, the door frame.
Mistake 5: Rushing
Take your time with the paper template step. It’s the difference between “nailed it” and “Pinterest fail.”
Gallery Wall Ideas by Room
Living Room: 9-12 piece salon-style arrangement above the sofa. Mix of abstracts, photographs, and typography.
Hallway: Linear arrangement of 5-7 matching frames. Travel photos, family portraits, or a series of prints.
Staircase: Follow the stair angle. Mix frame sizes to match the ascending line. Classic and dynamic.
Bedroom: Smaller arrangement (5-7 pieces) above the bed. Calming color palette. Relaxed asymmetric layout.
Home Office: Grid of 6 matching frames behind your desk. Professional background for video calls.
Start Your Gallery Wall
Ready to create your gallery wall? Browse our curated collections — every piece is available in multiple sizes and made to order. If your print arrives damaged, defective, or with a print-quality issue, contact us within 14 days with photos so we can review it and arrange a replacement or refund after confirmation.
Start Building Your Gallery Wall Today
The best gallery walls start with great individual pieces. Here’s where to find them:
- Mixed media gallery: Pair abstract prints with landscape photography for a curated, collected look
- Botanical gallery: Floral wall art in varying sizes creates a lush, layered arrangement
- Minimalist gallery: Typography prints in a single color palette make a striking statement with clean simplicity
- Not sure on sizes? Our wall art size guide covers gallery wall proportions in detail
Printer’s tape on the wall, a mix of sizes, and art you actually love — that’s all a gallery wall takes. Browse and build yours.
Need help planning? Our size guide shows every piece in room settings, so you can visualize proportions before buying.